
Generally, a shower stall is lined with a lead shower pan beneath the base
of mortar and tile. Though when this technique was invented, it was found
quite innovative but in practical usage the truth is far from it. Such kind
of arrangement most often fails to sustain a long enough life span and the
very purpose for which it is being installed. Now-a-days a very simple
solution is being used to overcome this nagging issue of leaking shower
stall, that is, installation of a rubber liner before laying the tiles in a
given shower stall. Not only is the installation of rubber lining quite
easy, but it also serves the purpose of a leak proof shower stall.
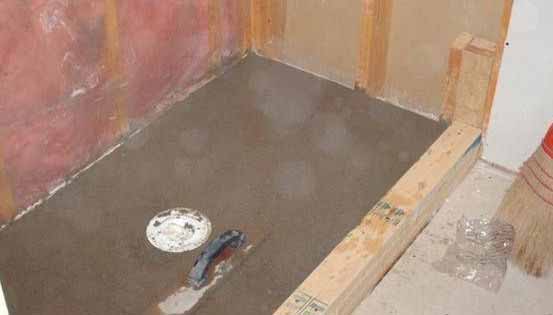

Here is a step by step procedure to install a rubber liningin a shower stall.
Step 1
The very first step while installing a rubber lining in a shower stall is to measure the dimensions of the shower stall floor and also add 6 inches more to the actual dimensions on all four sides respectively.
Step 2
Now the next thing to do is to cut an appropriately measured rubber lining as per the floor dimensions. For this, one needs to lay out the rubber lining on a clean floor and chalk out the measured dimensions of the floor onto the rubber liner. Once the dimensions are marked well on the rubber liner, the next step is to cut it with the help of a box cutter.
Step 3
After cutting the measured rubber lining, its time now to lay this measured lining onto the shower floor. Once you are through with its laying on the floor, make a hole over the drain using a box cutter again.
Step 4
Lastly, smooth out the laid rubber liner neatly to all the four shower stall corners and fix this liner in the wooden frame with the help of screws and power drills. Look out for excess lining and trim it out for a clean and neat look.
- Anti Vibration Mountings
- Automobile Rubber Products
- Calendered Rubber Products
- Extruded Rubber Products
- Medical Rubber Products
- Metal Bonded Components
- Rubber Adhesives & Sealants
- Rubber Ball
- Rubber Bands
- Rubber Beading
- Rubber Bearing
- Rubber Belt
- Rubber Buckets
- Rubber Bullets
- Rubber Cable
- Rubber Coating
- Rubber Duct
- Rubber Expansion Joints
- Rubber Flooring/Matting
- Rubber Footwear
- Rubber Gloves
- Rubber Injection Parts
- Rubber Lining
- Rubber Magnets
- Rubber Molded Products
- Rubber Pads
- Rubber Rollers
- Rubber Stopper
- Rubber Suit
- Rubber Track
- Rubber Valve
- Rubber Balloon
- Rubber Stamps
- Rubber Fenders
- Acrylic Rubber (ACM)
- Butadiene Rubber (BR)
- Butyl Rubber (IIR)
- Chlorosulfonated Polyethylene(CSM)/ Hypalon
- Ethylene Propylene Diene Monomer
- Fluoroelastomers (FKM)/Viton
- Isoprene Rubber (IR)
- Nitrile Rubber (NBR)
- Perfluoroelastomer (FFKM)
- Polychloroprene (CR)/Neoprene
- Polysulfide Rubber (PSR)
- Silicone Rubber (SiR)
- Styrene Butadiene Rubber
How to Make a Custom Rubber Stamp?
Whenever designing a custom stamp for your company, never compromise on its quality because in the end it is the most...
Read MoreLatex and Silicone Rubber Tubing - A Comparison!
Many industries use rubber tubing for various purposes. In fact, various types of rubber tubing are used for different applications...
Read MoreSilicone vs Acrylic Adhesive- A Comparison
Silicon and acrylic adhesives are those rubber adhesives that are widely used in Polyimide tapes. In fact, the polyimide...
Read More